
The short answer. Install DocRunner, upload your PDF, and place the signature fields. Map your board so columns fill the document and an Email column supplies the signer. Pick a status value as the trigger. From then on, changing an item to that status sends the document, and the signed PDF comes back to the item.
Before you start.
You need four things.
- A monday.com board with a Status column and an Email column for the signer.
- The document as a PDF. A contract, lease, offer letter, or any form you send repeatedly.
- A DocRunner account. The 7-day free trial covers everything in this guide.
- Permission to install apps on your monday.com account, or an admin who can do it for you.
This walkthrough uses the same example as our complete guide to document signing in monday.com. The board is Client Onboarding, and the item is Harbor Dental Group.
Set it up in six steps.
Step 1: Upload the PDF and place the fields
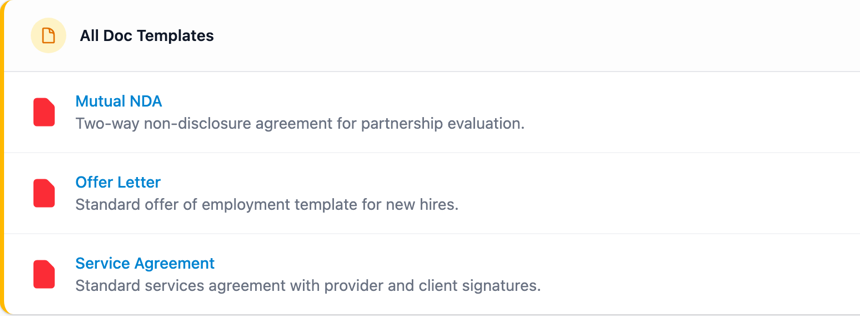
In DocRunner, open Doc Templates and click Upload Template. Each PDF becomes a reusable Doc Template.
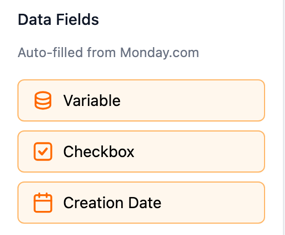
Click Edit Fields and drag fields onto the page. Signer fields are what the person fills in: signature, initials, date, text, checkbox, and radio.
Data fields are different. They are filled from your monday.com board before the signer ever sees the document. Drop a Variable where the client name, fee, or start date should appear.
Step 2: Create the packet template
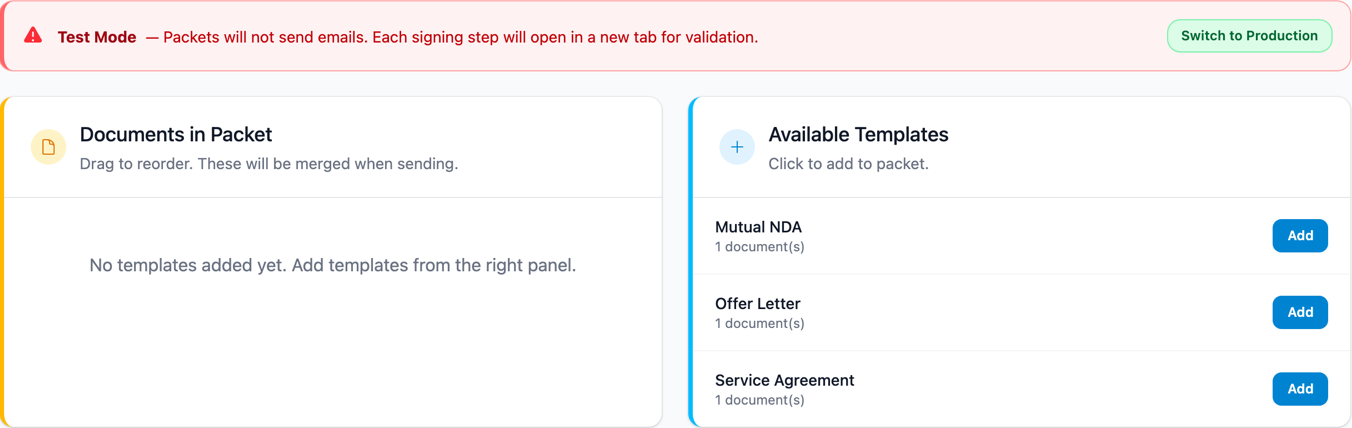
A Packet Template bundles one or more documents and defines who signs. Open Packet Templates, create one, and add your documents from the right-hand panel. They are merged into one signing session in the order you set.
Then add signer roles, such as Client and Account Manager. Give roles different steps (1, 2, 3) to sign in sequence. Give them the same step to sign in parallel.
Our view: leave Test Mode on until Step 5. It costs nothing and it catches misplaced fields.
Step 3: Connect monday.com
If you installed DocRunner from the monday.com marketplace, the connection is already made. If not, go to Settings, open Integrations, click the connect button, and authorize access.
DocRunner uses this connection to read item data, update status columns, and upload the signed PDF.
Step 4: Map the board
Open the packet template and create a mapping. The mapping screen has four parts:
- Pull data from monday. Match each Variable to a column. Contract Value fills the fee. The item name fills the client name.
- Who signs. Point each role at an Email column, or set a fixed email address for someone who signs every time.
- When to create packets. Choose the Status column and the trigger value, such as "Send Contract".
- Sync back to monday. Choose the status for sent, for each signer finishing, and for fully signed. Pick the Files column for the signed PDF.
Save, then register the webhook when DocRunner prompts you. The webhook is what lets monday.com tell DocRunner the status changed. Your mapping list should show it as Active.
| Packet Template | Trigger | Auto-Send | Webhook |
|---|---|---|---|
| Client Onboarding Packet | Status → Send Contract | On | Active |
| Mutual NDA | Status → Send NDA | Off | Active |
Step 5: Test on a dummy item
Create a test item with your own email address. Change its status to the trigger value.
In Test Mode, DocRunner sends no emails. Each signing step opens in a new tab, so you can sign as every role yourself. Check three things: the variables filled correctly, every field is reachable, and the board status moved at each stage.
Step 6: Go live
On the packet template, click Switch to Production. In the mapping, turn on Auto-Send if you want packets to go out the moment the status changes.
With Auto-Send off, DocRunner builds a draft and waits. That suits documents a person should review before they leave the building.
Three ways to send.
1. Change the status
This is the everyday method. Set the item to your trigger value and you are done.
2. Use a monday automation
DocRunner also works as an action in monday automations. Use this when the send should follow something other than a status change, such as a date arriving or a form being submitted.
3. Send manually from DocRunner
For a one-off, open the packet template, click Send Packet, enter the signer emails, and send. No board item is needed.
What the signer sees.
The signer gets an email with a unique link. They do not need an account, and it works on a phone. The flow is short:
- They accept the electronic signature disclosure.
- They type their name once to create a signature and initials.
- They click each field to sign. A counter shows how many are left.
- They click Complete Signing. They can also decline, which is recorded.


When one signer finishes, the next person in the order is emailed automatically.
Track it and follow up.
You should rarely need to leave the board. The status column shows where each document stands, the Link column opens the packet, and the Files column holds the signed PDF when it is done.
For anything else, open the Packets page in DocRunner. From there you can see who has signed, send a reminder, and download the final PDF. Automatic reminders can also nudge whoever has not signed yet.
Every completed packet gets a Certificate of Signature with timestamps, IP addresses, and a SHA-256 hash of the final document.
Troubleshooting.
I changed the status and nothing happened
Check three things in order. The webhook on the mapping should read Active, not "Not registered". The trigger value must match the status label exactly. And the mapping must be on this board, not a copy of it.
The packet was created but not sent
Auto-Send is off, so DocRunner made a draft. Send it from the Packets page, or turn Auto-Send on in the mapping.
The document has the wrong data
Fix the columns on the item, then set the status to the trigger value again. DocRunner replaces the unsent draft with a fresh one built from the current values.
No email arrived during testing
That is Test Mode working as designed. It opens signing in a new tab and sends no email. Switch to production to send real emails.
A variable came through blank
The column was empty on that item, or the Variable is not mapped. Open the mapping and look for anything marked "Not mapped".
Frequently asked questions.
Can I send a document from monday.com without leaving the board?
Yes. Once the board is mapped, changing the status is the whole action. DocRunner builds the document from the item and emails it.
Can I send several documents at once?
Yes. A packet holds multiple PDFs, and the signer completes them in one session with one link.
Can two people sign the same document?
Yes. Add a role for each signer and set the order. They can sign one after another or at the same time.
Does the signer need a monday.com account?
No. They only need the email link.
How many documents can I send?
DocRunner is $40 per month for unlimited documents, signers, templates, and users.
Bottom line.
The setup is six steps, and you do it once per document type. After that, sending a contract is a status change, and the signed copy files itself on the item.
Start a 7-day free trial of DocRunner and run Step 5 on a dummy item today. For the bigger picture, including how this compares with DocuSign and Zapier routes, read the complete guide to document signing in monday.com.